|
 Software Settings - 1. Launching Creative Media Lite automatically
- 2. Checking for Creative Media Lite updates weekly
Quick Format - 1. Formatting your player
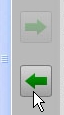
Navigation - 1. Moving up one folder quickly
Ripping - 1. Ripping tracks
Transfers - 1. Transferring tracks from your computer to your player
- 2. Transferring tracks from your player to your computer
- 3. Transferring data files
Player Management - 1. Deleting tracks
- 2. Creating a new folder
- 3. Checking the battery level on your player
- 4. Disconnecting your player safely
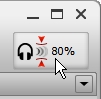
Volume Restriction - 1. Setting the maximum volume limit
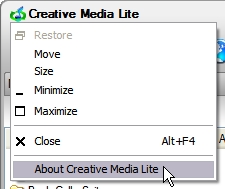
Firmware and Software - 1. Identifying your Creative Media Lite version
- 2. Identifying the player software (firmware) version
- 3. Checking for updates
 Software Settings Quick Format Navigation Ripping Transfers
 |
|
 |
1. Transferring tracks from your computer to your player
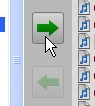
Click the Transfer to Player button to copy tracks from your computer to your player
- Click the right panel and select the folder where you want to copy tracks to.
- Click the left panel and select the tracks or folders that you want to copy.
- Click the Transfer to Player button (above).
Warning: Do not disconnect your player while transfer is in progress.
Tips:
- Like in Windows® operations, you can select multiple tracks within one window. To select specific tracks, hold down the CTRL or SHIFT key, and click the tracks you want. To select all tracks, hold down the CTRL key, and press the “A” key. The selected tracks are highlighted.
- You can also transfer tracks to your player by dragging them to the right panel, or by right-clicking the tracks and selecting the Transfer to Player option.
|
Back to top
|
 |
|
 |
|
| |
|
|
|
2. Transferring tracks from your player to your computer
Click the Transfer to PC button to copy tracks from your player to your computer
- Click the right panel and select the folder where you want to copy tracks to.
- Click the left panel and select the tracks or folders that you want to copy.
- Click the Transfer to PC button (above).
Warning: Do not disconnect your player while transfer is in progress.
Tips:
- Like in Windows operations, you can select multiple tracks within one window. To select specific tracks, hold down the CTRL or SHIFT key, and click the tracks you want. To select all tracks, hold down the CTRL key, and press the “A” key. The selected tracks are highlighted.
- You can also transfer tracks to your computer by dragging them to the right panel, or by right-clicking the tracks and selecting the Transfer to PC option.
|
Back to top
|
|
|
|
|
| |
|
|
|
3. Transferring data files
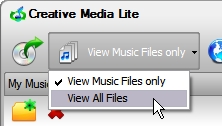
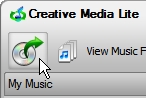
Click the Views button to display music files only or all files
- Click the Views button (above) and select the View All Files option. Music tracks and data files that are on your computer and player will be displayed.
- Click one panel and select the folder where you want to copy files to.
- Click the other panel and select the files or folders that you want to copy.
- Click the Transfer to Player or Transfer to PC button.
Warning: Do not disconnect your player while transfer is in progress.
Tips:
- Like in Windows operations, you can select multiple files within one window. To select specific files, hold down the CTRL or SHIFT key, and click the files you want. To select all files, hold down the CTRL key, and press the “A” key. The selected files are highlighted.
- You can also transfer files by dragging them to a panel, or by right-clicking the files and selecting the Transfer to Player or Transfer to PC option.
|
Back to top
|
|
|
|
|
| |
Player Management Volume Restriction Firmware and Software
|
|
| |
|
|
|
2. Identifying the player software (firmware) version

Your player's firmware version is conveniently displayed in Creative Media Lite
Connect your player to the computer. The firmware version is indicated below the right panel.
Tip: Check for updates by clicking the Check For Updates icon.
|
Back to top
|
|
|
|
|
| |
|
|
| |
| |
|
|
|

 on your desktop to begin!